11 Temmuz 2012 Çarşamba
10 Temmuz 2012 Salı
9 Temmuz 2012 Pazartesi
Review: Beanfields Beans and Rice Chips
To contact us Click HERE


Who doesn't love chips? They are so versatile that you can do virtually anything with them. You can add them into casseroles, make nacho's, chips and dip, I've even had potato chips in chocolate chip cookies before! The only thing about chips are... they aren't that good for you. Which is why I absolutely love Beanfields bean and rice chips! These chips are

Now when I told the Mr. we had bean chips, he looked at me funny but when we ripped open a bag of the pico de gallo chips... well let's just say that the bag was supposed to serve 6 and it was gone in about 2 minutes flat. Not only did the Mr. and I eat the chips but I brought in a bag for my coworkers to try. One of the boss's at work always gets such a kick out of me having a food blog. So I thought I would bring in a bag of the nacho chips for him, and he loved them! He shared them with our other co-workers who all raved about them. He even took home the bag, went online and bought more chips.
Now even though these chips seemed to be a major hit both at home and at work, there is one thing I feel I should point out. These are BEAN chips. You can taste the BEANS. So, if you don't like BEANS, you might want to skip these chips. Now that that is out of the way, lets go over the flavors shall we?
Pico de Gallo- First one I tried, first one I fell in love with. There really is no chip to compare it to. You can taste the onion, tomatoes and bell peppers. And when you pair that with the rice and bean chip as a foundation, it just completes it.
Nacho- I hate to compare a chip to another but this tastes exactly like nacho Doritos. They don't look anything alike but the flavoring is spot on. There is a plus with this one. If you have a vegan in the house, these are perfect for them!
Sea Salt- We were a little disappointed in this one. When you think sea salt, you think salty and we just didn't get it with this chip. At first I thought I grabbed the wrong bag when we started eating these because you can barely taste any salt on them.
Sea Salt & Pepper- This is where opinions differ. Again, not a whole lot of salt going on. I could taste the pepper on the chips but the Mr. (who doesn't like pepper) said he couldn't really taste any. Which in my opinion is a good thing because if I even so much as think of putting pepper in our food while I'm cooking, it's as if an internal alarms go off because he is out in the kitchen "getting a glass of water".
Unsalted- Not a huge difference between this chip and the salted. However, these are perfect for someone watching their sodium intake.
Now even though we were not huge fans of the unflavored chips, we still kept saying how great the chip itself was. Plus they would be PERFECT paired with a dip. I once made a creamy mushroom dip that would go great with the salt and pepper chips.
The Mr. and I have already decided to buy more of their chips online.

I received one or more of the products mentioned above for free using Tomoson.com. Regardless, I only recommend products or services I use personally and believe will be good for my readers.
Who doesn't love chips? They are so versatile that you can do virtually anything with them. You can add them into casseroles, make nacho's, chips and dip, I've even had potato chips in chocolate chip cookies before! The only thing about chips are... they aren't that good for you. Which is why I absolutely love Beanfields bean and rice chips! These chips are
- Gluten-free
- Corn free
- Farmed and made in the USA (Hell yeah!)
- Allergy free (they don't contain any of the Food & Drug Administration's list of 8 foods that trigger 90% of all allergic reactions to food)
Now when I told the Mr. we had bean chips, he looked at me funny but when we ripped open a bag of the pico de gallo chips... well let's just say that the bag was supposed to serve 6 and it was gone in about 2 minutes flat. Not only did the Mr. and I eat the chips but I brought in a bag for my coworkers to try. One of the boss's at work always gets such a kick out of me having a food blog. So I thought I would bring in a bag of the nacho chips for him, and he loved them! He shared them with our other co-workers who all raved about them. He even took home the bag, went online and bought more chips.
Now even though these chips seemed to be a major hit both at home and at work, there is one thing I feel I should point out. These are BEAN chips. You can taste the BEANS. So, if you don't like BEANS, you might want to skip these chips. Now that that is out of the way, lets go over the flavors shall we?
Pico de Gallo- First one I tried, first one I fell in love with. There really is no chip to compare it to. You can taste the onion, tomatoes and bell peppers. And when you pair that with the rice and bean chip as a foundation, it just completes it.
Nacho- I hate to compare a chip to another but this tastes exactly like nacho Doritos. They don't look anything alike but the flavoring is spot on. There is a plus with this one. If you have a vegan in the house, these are perfect for them!
Sea Salt- We were a little disappointed in this one. When you think sea salt, you think salty and we just didn't get it with this chip. At first I thought I grabbed the wrong bag when we started eating these because you can barely taste any salt on them.
Sea Salt & Pepper- This is where opinions differ. Again, not a whole lot of salt going on. I could taste the pepper on the chips but the Mr. (who doesn't like pepper) said he couldn't really taste any. Which in my opinion is a good thing because if I even so much as think of putting pepper in our food while I'm cooking, it's as if an internal alarms go off because he is out in the kitchen "getting a glass of water".
Unsalted- Not a huge difference between this chip and the salted. However, these are perfect for someone watching their sodium intake.
Now even though we were not huge fans of the unflavored chips, we still kept saying how great the chip itself was. Plus they would be PERFECT paired with a dip. I once made a creamy mushroom dip that would go great with the salt and pepper chips.
The Mr. and I have already decided to buy more of their chips online.
I received one or more of the products mentioned above for free using Tomoson.com. Regardless, I only recommend products or services I use personally and believe will be good for my readers.
Sculpture Garden -- Round 2
To contact us Click HERE


Photo overload. Finally had the chance to upload and edit photos that have been sitting on my camera for a week. My nose was busy buried in The Hunger Games.
Last weekend when I was in the Cities, I went to the Minneapolis Sculpture Garden again with some friends. It was so gorgeous out, much better than the first time where it was freezing. Loving the t-shirt weather we are having in mid-March.
A Lovely Little Thought
To contact us Click HERE
 source
I have started to suck at this blogging thing. I'm not quite sure what's been distracting me. Possibly it's that I've started reading books again. My TV hasn't even been on for more than a couple hours in the last week and a half. Usually its there for random noise. Maybe it's that I've picked up running every day as a new hobby. Or it could be after spending 8 hours sitting front of a computer a day, my brain just can't handle it after hours anymore.
Meh, whatever the reason, my apologies. Hopefully I can get my act together.

source I have started to suck at this blogging thing. I'm not quite sure what's been distracting me. Possibly it's that I've started reading books again. My TV hasn't even been on for more than a couple hours in the last week and a half. Usually its there for random noise. Maybe it's that I've picked up running every day as a new hobby. Or it could be after spending 8 hours sitting front of a computer a day, my brain just can't handle it after hours anymore.
Meh, whatever the reason, my apologies. Hopefully I can get my act together.
Make This: Springtime Wreath
To contact us Click HERE

I made this springtime wreath a month or two ago when I decided we weren't really going to have a winter. Super simple and easy project to dress up any bland white door.
You will need:
I caught my craft store at a good time when the yarn and flower was on sale. I think it cost me around $10 total with plenty of yarn to spare.
I made this springtime wreath a month or two ago when I decided we weren't really going to have a winter. Super simple and easy project to dress up any bland white door.
You will need:
- styrofoam ring
- yarn
- ribbon
- fun flower
- glue
I caught my craft store at a good time when the yarn and flower was on sale. I think it cost me around $10 total with plenty of yarn to spare.
Behind the Lens: Into the Wild (Sort Of)
To contact us Click HERE


One: Wow, it's been along time since I've posted anything on here. Oops.
Two: Minnesota weather is the craziest! Tornadoes, snow, rain, and wind. All in one state. 25 degree temperature difference between the north and south sides of the Twin Cities.
Three: Yesterday I found a little lake about 5 minutes from Hutch that had a little patch of woods. And by little I mean absolutely tiny. But it was enough to kind of feel like the middle of nowhere. For a moment it was like being back up in Bemidji exploring areas by the lake. It was great to photograph a different atmosphere than farmland or city life.
Hopefully I'll get better at posting again...
8 Temmuz 2012 Pazar
Weekly Recipe #59: Macaroons
To contact us Click HERE
After Toast!, our volunteer celebration, we received quite a few requests for the macaroon recipe that Lila made for our fabulous volunteers. Chef Cassie obliged with the recipe, so here's some coconut-y love, from our kitchen to yours:
Macaroons
(Makes roughly 2 dozen)
7 oz. water (3/4 cup + 2 tbsp.)
1 tsp. salt
2 1/2 cups sugar
3 oz. light corn syrup (1/4 cup + 2 tbsp.)
1/2 oz. vanilla bean paste (1 tbsp.) [available at Byerly's]
1 lb. desiccated coconut [unsweetened, finely ground coconut - found at most co-ops]
1 oz. cream cheese (2 tbsp.)
25 oz. egg whites (3 cups + 2 tbsp.) [we suggest buying a carton of egg whites]
1. Preheat the oven to 350 degrees.
2. Bring the water, salt, sugar, corn syrup and vanilla to a boil. Once it comes to a boil, remove from heat. Put the liquids in a mixing bowl, adding the coconut, cream cheese and egg whites one at a time and mixing until each is incorporated.
3. The mixture should be fairly firm and thick. If it is runny and doesn't hold its shape when pressed into a ball (or seems to slump), mix in more dry coconut until it holds a firm and dense ball shape when squeezed in your hand.
4. Using a large ice cream scoop, press macaroon dough (should be firm) into scoop and level with side of the mixing bowl. Place on parchment lined sheet trays.
5. Bake at 350 degrees for about 13 minutes. Macaroons should be golden brown and crispy on the outside but still nice and soft on the inside.
Reflections on Ethiopia
To contact us Click HERE
By Ben Penner, Farm Director
Now that I’ve been back from Ethiopia for a few weeks, I've had a chance to reflect on the work of Open Arms in that country. Our support for the nutrition project there has been vital to nearly 4,000 people over the years, and that is only the tip of the iceberg in terms of the scale and scope of the need. Sometimes, however, our first impressions are the best, and so I’d like to share some of my initial thoughts in fairly raw form. Perhaps this will give you a sense of the experience as it was happening.

Here are those thoughts:
> I’ve been learning what I can about the history of Ethiopia. I’d like to be a good guest here but I feel like I am primarily an American overseas -- someone certainly interested in positive social change, but at best limited in my knowledge of how to effect that change and at worst naïve about how the world really works. Trying to fit this all into a workable framework would probably take years -- I only have about a week.
> Marble. The first thing I notice getting off of the plane from Amsterdam is the marble. Marble is everywhere in the airport. The strip malls and shopping malls have marble. Marble is everywhere, and marble is cheap -- in Ethiopia. How is that for some perspective?
> Driving southward out of Addis the traffic turns from cars, minibuses and taxis to large semis straining with cargo and shipping containers. Yoseph, our guide today, tells us that the large amount of truck traffic on this road is going to and from the main shipping port in Djibouti. The traffic on this road is indicative of the development going on throughout the country and especially around Addis. Foreign investment has created a frenzy of economic activity -- manufacturing, construction and public works projects such as the widening of Bole Road (the main road in Addis from the airport to downtown) is managed by Chinese companies with Ethiopian labor.
> There is so much open land. It is the dry season so it is hard to imagine green fields, but the land itself is fertile and -- with enough water, labor and time -- is very productive. The government has begun a number of different irrigation projects to address the need for water during these dry periods. Mostly what will be grown are cash crops -- cotton, sugar cane and perhaps teff, the grain that makes the Ethiopian staple food injera.
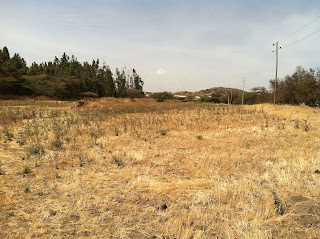
> I have never seen this kind of development, even when I visited India. The new factories being built take on the cast of global scope and scale, the type of development we hear about on the news but don’t actually see in the U.S. -- and yet many people here appear impoverished. This juxtaposition is startling for me. I read that 85 percent of the population in Ethiopia is involved in agriculture, and by observation I can tell that this must be accurate. Most people appear to be working in one way, shape or form in agriculture. I wonder how the development occurring will affect them and their livelihoods. Will it improve their situation? I hope so.
Now that I’ve been back from Ethiopia for a few weeks, I've had a chance to reflect on the work of Open Arms in that country. Our support for the nutrition project there has been vital to nearly 4,000 people over the years, and that is only the tip of the iceberg in terms of the scale and scope of the need. Sometimes, however, our first impressions are the best, and so I’d like to share some of my initial thoughts in fairly raw form. Perhaps this will give you a sense of the experience as it was happening.
Here are those thoughts:
> I’ve been learning what I can about the history of Ethiopia. I’d like to be a good guest here but I feel like I am primarily an American overseas -- someone certainly interested in positive social change, but at best limited in my knowledge of how to effect that change and at worst naïve about how the world really works. Trying to fit this all into a workable framework would probably take years -- I only have about a week.
> Marble. The first thing I notice getting off of the plane from Amsterdam is the marble. Marble is everywhere in the airport. The strip malls and shopping malls have marble. Marble is everywhere, and marble is cheap -- in Ethiopia. How is that for some perspective?
> Driving southward out of Addis the traffic turns from cars, minibuses and taxis to large semis straining with cargo and shipping containers. Yoseph, our guide today, tells us that the large amount of truck traffic on this road is going to and from the main shipping port in Djibouti. The traffic on this road is indicative of the development going on throughout the country and especially around Addis. Foreign investment has created a frenzy of economic activity -- manufacturing, construction and public works projects such as the widening of Bole Road (the main road in Addis from the airport to downtown) is managed by Chinese companies with Ethiopian labor.
> There is so much open land. It is the dry season so it is hard to imagine green fields, but the land itself is fertile and -- with enough water, labor and time -- is very productive. The government has begun a number of different irrigation projects to address the need for water during these dry periods. Mostly what will be grown are cash crops -- cotton, sugar cane and perhaps teff, the grain that makes the Ethiopian staple food injera.
> I have never seen this kind of development, even when I visited India. The new factories being built take on the cast of global scope and scale, the type of development we hear about on the news but don’t actually see in the U.S. -- and yet many people here appear impoverished. This juxtaposition is startling for me. I read that 85 percent of the population in Ethiopia is involved in agriculture, and by observation I can tell that this must be accurate. Most people appear to be working in one way, shape or form in agriculture. I wonder how the development occurring will affect them and their livelihoods. Will it improve their situation? I hope so.
Weekly Recipe #60: Lime-Spiked Corn Chowder
To contact us Click HERE
By Sarah Leonard, Open Arms Chef
There are two secrets to an award-winning vegetarian soup: butter and heavy cream.
To build real depth of flavor in a vegetarian soup requires a lot of layering of flavors you might usually associate with meat products—roasting, smoking, grilling, etc. We used roasted garlic and grilled fresh corn to emulate a smoky, meaty flavor in this vegetarian chowder. The lime juice at the end really helped to brighten up the richness of the butter and cream.
Although this soup is fantastic vegetarian, you could also begin by rendering the fat out of some bacon and use that to sauté your vegetables instead of the butter. Remove the bacon and reserve, crumbling over the top of the soup as a garnish.
Lime-Spiked Corn Chowder
(Makes approximately 5 quarts)
1 head of garlic
1 tbsp. olive oil
8 cobs of corn
3 tbsp. vegetable oil
1 tbsp. salt
1 stick of butter
1 1/2 cups diced onion
1 1/2 cups diced celery
4 cups milk
8 cups vegetable stock
2 tbsp. butter
2 tbsp. flour
Zest from 1 lime
3 cups heavy cream
2/3 cup fresh lime juice
Salt and white pepper to taste
3 cups diced red bell pepper
½ cup chopped cilantro
Roast Garlic:
Preheat oven to 350 degrees. Cut off the top ½ inch of the head of garlic, exposing the individual cloves. Drizzle with olive oil. Wrap garlic, cut side up, with aluminum foil and roast until the clove of garlic is tender and golden brown. Squeeze garlic out of skins and reserve.
Grill Corn:
Coat the cobs of corn lightly with vegetable oil and sprinkle with salt. Grill over high heat to char the kernels. The cobs should be somewhere around 50-60% charred. Remove from grill and let cool. Cut the corn kernels off the cobs and reserve both.
Make Soup Base:
Melt the stick of butter in a large stockpot. Sweat half of the onions and celery in butter until softened. Meanwhile, blend roasted garlic with enough of the milk to make a smooth mixture. Add to vegetables in pot along with vegetable stock and remaining milk. Add corn cobs to stockpot. Let simmer for 1-3 hours, depending on how long you have. Let cool completely.
Finish Soup:
Strain the vegetables out of the soup base and discard them. In a heavy stockpot melt 2 tbsp. butter. Sautee remaining onions and celery just until softened. Add 2 tbsp. flour and continue cooking over medium heat for approximately 7 minutes, or until the flour loses its raw flavor. Slowly stir in the soup base, incorporating it into the veggie/flour mixture evenly. Add the lime zest and reserved corn kernels. Bring to a simmer. Add the heavy cream and bring back up to a very light simmer. Add lime juice, salt and white pepper to taste. You will know you have added enough salt when the lime flavor really pops. Stir in the red peppers and cilantro to serve.
What You DON'T Know About Salt
To contact us Click HERE
By Gwen Hill MS, RD, LD
In my last post for National Nutrition Month, I talked about decreasing salt intake to limit sodium. Now let’s talk about the different kinds of salt.
Kosher, sea and iodized salts have all had their share of the spotlight recently. What’s the difference? They originate either from the sea or underground deposits, and each go through unique processing procedures. Chefs and bakers have their favorites, due to the texture that each possesses. Iodized salt is finer and dissolves more easily, making it preferable for baking. Kosher and sea salts are coarser, making them preferable for cooking. Kosher is cheaper than sea salt, making less of an impact on the wallet. But the most common question is, “Is one healthier than the other?”
Well, all of the salts have the same sodium content by weight. However, due to granule sizes, iodized salt appears to have a higher sodium content per measurement, as more granules fit into a teaspoon than the coarser sea salt and kosher versions. Here is the breakdown of sodium content in milligrams of the various salts per 1/4 teaspoon:
· ¼ tsp kosher salt = 480 mg sodium
· ¼ tsp sea salt = 480 mg sodium
· ¼ tsp iodized salt = 590 mg sodium
But there is a trade off to using kosher and sea salts instead of iodized salt…
Why is salt iodized?
In the early 1900s iodine deficiency was a problem, because the diets then did not contain foods that are naturally good sources of iodine. Iodine is necessary for the production of thyroid hormones, and a deficiency can lead to goiters, hypothyroidism and varying degrees of growth and developmental problems. The US salt industry added iodine to salt in 1924 based on Dr. David Marine and Dr. David Cowie’s research, which showed a significant reduction in goiters with the addition of iodized salt in the diet. Salt was the chosen vehicle for iodine due to its staple status in most American’s diets. Because many of these iodine deficiency symptoms are no longer prevalent in America, many think that we no longer need to monitor our iodine intake.
This is a misconception -- we still need iodine in our diets to continue to prevent these problems. In fact, iodine deficiency is still accepted as the most common cause of preventable brain damage in the world. Over 70 countries in the world participate in voluntary salt iodization programs, because of these effects.
You can get iodine from other sources, such as seafood and seaweed. It may also be found in crops grown in soil that has a significant source of iodine. However, due to a world-wide phenomenon, iodine is rapidly depleting from soil due to erosion. The plants grown in the eroded soil contain lower amounts of iodine than before. Because most of us will not get the iodine we need from these sources, iodized salt is still one of the best ways to get the iodine we need to prevent deficiency.
So is one kind of salt healthier than the other? Depends on how you look at it. Salt is salt when it comes to sodium. I suggest that you always limit your salt intake to decrease your sodium intake, regardless of salt type. But, if you need more iodine in your diet, iodized salt offers the clear benefit.
Our First Official Harvest at Open Farms
To contact us Click HERE
By Ben Penner, Farm Director
Outdoor farm work started early this year. Despite this spate of cooler temperatures over the last few days, farmers from around the state have been antsy since at least early March. They’re not alone; much warmer than normal temperatures have me thinking that I might have missed the window to plant my early season crops.
 This is the first year where we have experimented with season extension, and it’s hard to know what to plant. Indoor temperatures have already surpassed the 110 degree mark -- too warm for cool season crops -- but with overnight lows dipping to the high 20s, it is still too cool for tomatoes and peppers. I have experimented with a few tomatoes in the tunnel for the past few weeks and they were doing fine until it got down to 25. We had built a low tunnel within the high tunnel -- essentially creating a double layer of plastic -- which certainly increased the temperature a degree or two, but the low temperatures were still too much. I am happy to say, however, that the lettuce we planted last fall is doing fine, and I just delivered our first official harvest to Open Arms on Tuesday, April 10.
Over the next few days, I’ll continue to experiment with other methods to add another degree or two right at the soil surface near vulnerable plants. The only drawback is that, with this extra protection, daytime temperatures underneath that second layer of plastic have reached over 120 degrees. Since the conditions have been so variable, I have been compromising by direct-seeding turnips, broccoli, kale arugula and spinach crops outside and covering them with a plastic layer or row cover, or even just leaving them bare. One way or another one of these strategies is bound to give us an earlier than usual harvest in the hot spring of 2012.
If you would like to learn more about season extension, join me to plant, weed, prune, build trellises and lay down irrigation in the hoop house and the low tunnels at Open Farms this growing season. Check out our website for upcoming shifts.
Outdoor farm work started early this year. Despite this spate of cooler temperatures over the last few days, farmers from around the state have been antsy since at least early March. They’re not alone; much warmer than normal temperatures have me thinking that I might have missed the window to plant my early season crops.
This is the first year where we have experimented with season extension, and it’s hard to know what to plant. Indoor temperatures have already surpassed the 110 degree mark -- too warm for cool season crops -- but with overnight lows dipping to the high 20s, it is still too cool for tomatoes and peppers. I have experimented with a few tomatoes in the tunnel for the past few weeks and they were doing fine until it got down to 25. We had built a low tunnel within the high tunnel -- essentially creating a double layer of plastic -- which certainly increased the temperature a degree or two, but the low temperatures were still too much. I am happy to say, however, that the lettuce we planted last fall is doing fine, and I just delivered our first official harvest to Open Arms on Tuesday, April 10.Over the next few days, I’ll continue to experiment with other methods to add another degree or two right at the soil surface near vulnerable plants. The only drawback is that, with this extra protection, daytime temperatures underneath that second layer of plastic have reached over 120 degrees. Since the conditions have been so variable, I have been compromising by direct-seeding turnips, broccoli, kale arugula and spinach crops outside and covering them with a plastic layer or row cover, or even just leaving them bare. One way or another one of these strategies is bound to give us an earlier than usual harvest in the hot spring of 2012.
If you would like to learn more about season extension, join me to plant, weed, prune, build trellises and lay down irrigation in the hoop house and the low tunnels at Open Farms this growing season. Check out our website for upcoming shifts.
7 Temmuz 2012 Cumartesi
Volunteer Appreciation Week: Pete Takes a Look Back
To contact us Click HERE

By Pete Fischer, Volunteer Services Coordinator
When I think back to when I first started as a volunteer coordinator at Open Arms a lot has changed...
I started when Open Arms first began running its capital campaign to build our current building. I was a fresh-out-of-college employee trying to learn the culture of Open Arms and figure out where I was sending my volunteers. Back then, everyone sat in cubicles so close together that it felt like being crammed into a sardine can.
When I started, we served 380 clients. Back then, we only had about 15-18 delivery routes Monday through Friday. The first volunteer shift started at 9 a.m., and only 3-5 volunteers would volunteer per shift. I can recall a group of women who volunteered Tuesday mornings that I was terrified of!
As days have turned into years, my how things have changed! Today we serve 800 clients a week and our first volunteer shift starts at 7:30 a.m.! Delivery has expanded onto Saturdays, and a typical day consists of 25-30 routes. We have an organic farm, complete with its own volunteer shifts. Oh, and those women still volunteer on Tuesday mornings -- and have become some of my closest friends.
As I think about where we have come as an organization and where we are going, I can’t help but think about the volunteers that make our vision possible. There is not enough coffee, donuts, gas money and thank you cards to tell you how much we appreciate the work you do for us. Thank you, volunteers, for everything you give us each and every day!
Irrigation at Open Farms
To contact us Click HERE
By Ben Penner
When the hot weather hits it is critical that plants in thegarden (not to mention the people working in the garden!) get enough timely moisture to grow properly for an abundantharvest. At Open Farms we irrigate primarily using twodifferent systems; drip irrigation (preferred) and sprinkler irrigation when necessary.
Sprinkler irrigation has the benefit of covering a wide areaquickly, but some water never gets to the plant because the water is loftedhigh in the air with some of it evaporating before it gets to the soil. Additional water is lost because it covers theentire area rather than precisely down the row. We primarily use our sprinklers on crops where it would be prohibitiveto irrigate each and every row (lettuce mix, for example).
 Drip irrigation takes some time and expertise to install,but once it is installed it puts the water exactly where the plants need it. We use “T-Tape” also known as “Drip Tape”which is flexible oval-shaped plastic tubing with slits cut every 12”. When connected to a water source it emits ½gallon of water every minute per 100’ of tape. If that sounds just a bit technical, well, it is, but basically it getsthe water out there, and that is what a farmer or gardener wants.
By Ben Penner
When the hot weather hits it is critical that plants in thegarden (not to mention the people working in the garden!) get enough timely moisture to grow properly for an abundantharvest. At Open Farms we irrigate primarily using twodifferent systems; drip irrigation (preferred) and sprinkler irrigation when necessary.
Sprinkler irrigation has the benefit of covering a wide areaquickly, but some water never gets to the plant because the water is loftedhigh in the air with some of it evaporating before it gets to the soil. Additional water is lost because it covers theentire area rather than precisely down the row. We primarily use our sprinklers on crops where it would be prohibitiveto irrigate each and every row (lettuce mix, for example).
Drip irrigation takes some time and expertise to install,but once it is installed it puts the water exactly where the plants need it. We use “T-Tape” also known as “Drip Tape”which is flexible oval-shaped plastic tubing with slits cut every 12”. When connected to a water source it emits ½gallon of water every minute per 100’ of tape. If that sounds just a bit technical, well, it is, but basically it getsthe water out there, and that is what a farmer or gardener wants.Recipe Catch Up
To contact us Click HERE
So I have kind of lost track of what recipes I've made because I have made over the last few weeks. I went back and looked at the photos I've uploaded and found two different ones. Mmmm I thought there were more but I guess not.
Zucchini Herb Casserole

Ingredients
1/3 cup of uncooked brown rice
2/3 cup water
2 tablespoons olive oil
1 1/2 pounds of zucchini, cubed
1 cups of sliced green onions
1 clove garlic, minced
1 1/4 teaspoons garlic salt
1/2 teaspoon basil
1/2 teaspoon sweet paprika
1/2 teaspoon dried oregano
2 cups shredded cheese
Directions
1. Combine the rice and water in sauce pan and bring to boil, cover and simmer 20 minutes.
2. Heat oil in skillet over medium heat and cook zucchini, green onions, and garlic until tender. Season with garlic salt, basil, paprika and oregano. Mix in the cooked rice, tomatoes, and 1 cup cheese. Cook and stir until heated through. Transfer to greased 1 1/2 court casserole dish. Top with remaining cheese. Bake for 20 minutes.
This recipe was pretty easy to make. It was also very tasty. The spices worked well together. I do think its one I'd make again. I remember going a little overboard on the oil. This is because I didn't cut the zucchini small enough and to took a long time to get the it to get tender. I kept adding a little more oil because the zucchini seemed like it was absorbing all the oil.
Vegetarian Lime Orzo

Ingredients
2 tablespoons olive oil
2 cloves garlic, minced
2 cups orzo pasta
1 zucchini, peeled and shredded
1 carrot, peeled and shredded
1, 16 oz can, strewed tomatoes
1, 14 oz can, veggie broth
1 teaspoon Italian seasoning
1 teaspoon dried basil leaves
1/4 cup chopped green onions
1/4 cup chopped fresh parsley
2 teaspoon grated lime zest
2 tablespoons lime juice
1/2 cup grated parmesan cheese
Directions
1. Heat the olive oil in large skillet over medium heat. Stir in garlic and orzo pasta. Cook and stir until pasta turns a light, golden color. Stir in zucchini and carrots. Cook until tender. Stir in tomatoes, vegetable broth, italian seasoning, and basil. Season with salt and pepper to taste. Reduce heat to medium. Stir in green onions, parsley, lime zest, and lime juice. Remove from heat and cool. Sprinkle with cheese and serve.
We really didn't care for this recipe. The pasta was kind of dry. The flavor was okay but overall we really didn't like the recipe.
Zucchini Herb Casserole
Ingredients
1/3 cup of uncooked brown rice
2/3 cup water
2 tablespoons olive oil
1 1/2 pounds of zucchini, cubed
1 cups of sliced green onions
1 clove garlic, minced
1 1/4 teaspoons garlic salt
1/2 teaspoon basil
1/2 teaspoon sweet paprika
1/2 teaspoon dried oregano
2 cups shredded cheese
Directions
1. Combine the rice and water in sauce pan and bring to boil, cover and simmer 20 minutes.
2. Heat oil in skillet over medium heat and cook zucchini, green onions, and garlic until tender. Season with garlic salt, basil, paprika and oregano. Mix in the cooked rice, tomatoes, and 1 cup cheese. Cook and stir until heated through. Transfer to greased 1 1/2 court casserole dish. Top with remaining cheese. Bake for 20 minutes.
This recipe was pretty easy to make. It was also very tasty. The spices worked well together. I do think its one I'd make again. I remember going a little overboard on the oil. This is because I didn't cut the zucchini small enough and to took a long time to get the it to get tender. I kept adding a little more oil because the zucchini seemed like it was absorbing all the oil.
Vegetarian Lime Orzo
Ingredients
2 tablespoons olive oil
2 cloves garlic, minced
2 cups orzo pasta
1 zucchini, peeled and shredded
1 carrot, peeled and shredded
1, 16 oz can, strewed tomatoes
1, 14 oz can, veggie broth
1 teaspoon Italian seasoning
1 teaspoon dried basil leaves
1/4 cup chopped green onions
1/4 cup chopped fresh parsley
2 teaspoon grated lime zest
2 tablespoons lime juice
1/2 cup grated parmesan cheese
Directions
1. Heat the olive oil in large skillet over medium heat. Stir in garlic and orzo pasta. Cook and stir until pasta turns a light, golden color. Stir in zucchini and carrots. Cook until tender. Stir in tomatoes, vegetable broth, italian seasoning, and basil. Season with salt and pepper to taste. Reduce heat to medium. Stir in green onions, parsley, lime zest, and lime juice. Remove from heat and cool. Sprinkle with cheese and serve.
We really didn't care for this recipe. The pasta was kind of dry. The flavor was okay but overall we really didn't like the recipe.
Recipe: Country Chili
To contact us Click HERE
I am obsessed with chili. I love trying different recipes. Dan saw this recipe on the side of my TVP (textured vegetable protein) and told me we should try it. When he came home from work yesterday and saw I made chili he told me I was crazy because its over a 100 degrees here. What can I say.... I love chili! I haven't used the TVP for any recipes really. I generally mix taco seasoning with it and have tacos.

Ingredients
2 cups of boiling water
2 cups of TVP
2 Tbsp Ketchup
2 large onion, diced
1 green pepper
1 jalapeño
2 garlic cloves, minced
2 Tbsp chili powder
2 tsp cumin
2 tsp oregano
1/2 tsp cayenne pepper
2- 28 oz can of tomatoes, diced or chopped
2- 16 oz can of kidney beans with liquid
1. In large pot boil water and pour on top of TVP and ketchup. Set aside.
2. In large pan heat oil and saute onions, peppers and garlic until tender.
3. Add seasonings to TVP mixture. Stir with fork. Then add to vegetable mixture.
4. Add kidney beans and tomatoes. Cover and simmer for 30 min - hour.
This was definitely a great chili recipe. It's not my favorite. I am still a fan of this and this. Dan thought it was very good and I think he might even consider it to be one of the top chili recipes i've made. I kind of wonder if I should try to combine all my chili recipes into one. Haha! That's probably not a good idea.
Isaac is 4 months old!
To contact us Click HERE
When Isaac was in the NICU it seems like time stood still. That three weeks seemed to drag on and on. The NICU experience is typically compared to a marathon. Especially those that have babies that spend months in the NICU. Then when you get down to the point where you know coming home is close it gets even slower. Just like when you are close to the end of the marathon. Those last few miles seem a lot longer. But now that Isaac is four months old I find myself wondering where the time has gone. How can he be four months already?

Isaac decided to celebrate turning four months by sleeping for eight straight hours. I felt like a new woman. I am hoping it's something he decides to do again... and again... and again. When I went back to work he started going 5-6 hours. So even that is an improvement from last month.
I think having a routine has helped. We get up around 5:30-6 and I feed him then put him on his activity mat or back in the crib while I get ready for the day. Once I am finished I will generally get him ready. I get a new outfit on him and we'll play again. I feed him again about 30 minutes before we have to leave. I also change him before we leave too. I drop him off at daycare and head to work. After I pick him up we head home. He plays on his activity mat while I get his bottles ready for the next day, lunches ready for Dan and and a few other things too. The night varies depending on if its bath night or not. He's down for the night between 9-9:30.
Isaac is getting great head control as seen below. He loves to look around. He loves grabbing at things. He hasn't laughed yet nor rolled over but that's okay. He'll get there. He seems to really like daycare. He always has lots of smiles when I drop him off and lots of smiles when I pick him up. He loves cooing too. He loves sucking his thumb. He loves to stand (with us holding him of course).
Diaper photo! Just a reminder. He was 3 lbs 4.5 oz at birth and he was weighed on Monday and weighed 11 lbs 6 oz. I am so happy that he is doing so well!
He's doing great! I can't wait to see what the next month brings!
Isaac decided to celebrate turning four months by sleeping for eight straight hours. I felt like a new woman. I am hoping it's something he decides to do again... and again... and again. When I went back to work he started going 5-6 hours. So even that is an improvement from last month.
I think having a routine has helped. We get up around 5:30-6 and I feed him then put him on his activity mat or back in the crib while I get ready for the day. Once I am finished I will generally get him ready. I get a new outfit on him and we'll play again. I feed him again about 30 minutes before we have to leave. I also change him before we leave too. I drop him off at daycare and head to work. After I pick him up we head home. He plays on his activity mat while I get his bottles ready for the next day, lunches ready for Dan and and a few other things too. The night varies depending on if its bath night or not. He's down for the night between 9-9:30.
Isaac is getting great head control as seen below. He loves to look around. He loves grabbing at things. He hasn't laughed yet nor rolled over but that's okay. He'll get there. He seems to really like daycare. He always has lots of smiles when I drop him off and lots of smiles when I pick him up. He loves cooing too. He loves sucking his thumb. He loves to stand (with us holding him of course).
 |
| Mommy... this chair is kinda fun! |
 |
| March 5, 2012 |
 |
| July 5, 2012 |
Kaydol:
Yorumlar (Atom)